1 、首先生成密钥文件
[jinchuang@root ~]#ssh-keygen -b 2028 -t rsa
Generating public/private rsa key pair.
Enter file in which to save the key (/root/.ssh/id_rsa): 密钥文件存放路径
Enter passphrase (empty for no passphrase): 认证密码(不能低于4位)
Enter same passphrase again: 二次确认密码
Your identification has been saved in /root/.ssh/id_rsa.
Your public key has been saved in /root/.ssh/id_rsa.pub.
The key fingerprint is:
35:14:41:3d:b3:36:ba:eb:b3:4e:66:74:b7:b7:c0:bb root@dns.com
The key's randomart image is:
+--[ RSA 2028]----+
| .=+ |
| . + |
| o + |
| . .+ |
| S .o... |
| ..... . |
| +. o. .|
| +o o..|
| o=+ E.. |
+-----------------+
2、修改sshd_config 配置文件
[jinchuang@root ~]#vim /etc/ssh/sshd_config
RSAAuthentication yes 启用RSA认证
PubkeyAuthentication yes 启用公钥认证
AuthorizedKeysFile .ssh/authorized_keys 验证公钥存放路径
PasswordAuthentication no 禁用密码方式登录
UsePAM yes 使用身份验证模块
3、重启服务
[jinchuang@root ~]# service sshd restart
4、导入公钥到authorized_keys
[jinchuang@root ~]# mv .ssh/id_rsa.pub .ssh/authorized_keys
5,更改权限:
[jinchuang@root ~]# chmod 700 .ssh
[jinchuang@root ~]# chm0d 600 .ssh/authorized_keys
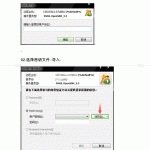
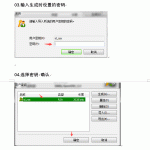
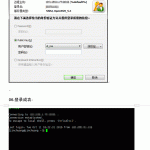
5、下载私钥到本地 (id_rsa)使用xshell 工具远程登录,
- 如果使用普通用户秘钥登录,禁用root登录:
- 把上面的1,4,5步骤使用普通用户操作即可
- 还需要添加修改的地方 sshd_config 文件添加 PermitRootLogin no #禁止root登录
- 普通用户的宿主目录权限要设置为700 的权限


